감사 합니다^^
SmartArt custom animation effects: pictures peek-in
(Basic)
To reproduce the SmartArt effects on this page, do the following:
On the Home tab, in the Slides group, click Layout, and then click Blank.
On the Insert tab, in the Illustrations group, click SmartArt.
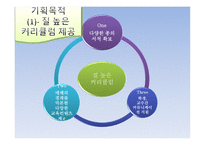
In the Choose a SmartArt Graphic dialog box, in the left pane, click Matrix. In the Matrix pane, double-click Titled Matrix (second option from the left) to insert the graphic into the slide.
Select the graphic. Under SmartArt Tools, on the Format tab, click Size, and then do the following:
In the Height box, enter 5.67”.
In the Width box, enter 8.5”.
Under SmartArt Tools, on the Format tab, click Aange, click Align, and then do the following:
Click Align to Slide.
Click Align Middle.
Click Align Center.
Select the graphic, and then click one of the aows on the left border. In the Type your text here dialog box, enter text in the top-level bullet only (text for the rounded rectangle at the center of the graphic). To remove the [Text] placeholder in the second-level bullets, select each bullet and press SPACE.
On the slide, select the graphic. Under SmartArt Tools, on the Design tab, in the SmartArt Styles group, click More, and then under Best Match for Document click Moderate Effect.
Select the rounded rectangle at the center of the graphic. On the Home tab, in the Font group, select 28 from the Font Size list, click the aow next to Font , and then click White, Background 1 (first row, first option from the left).
With the rounded rectangle selected, under SmartArt Tools, on the Format tab, in the bottom right corner of the Shape Styles group, click the Format Shape dialog box launcher. In the Format Shape dialog box, click Fill in the left pane, select Gradient in the Fill pane, and then do the following:
In the Type list, select Linear.
In the Direction list, select Linear Up (second row, second option from the left).
Under Gradient stops, click Add or Remove until three stops appear in the drop-down list.
Also under Gradient stops, customize the gradient stops as follows:
Select Stop 1 from the list, and then do the following:
In the Stop position box, enter 0%.
Click the button next to , and then under Theme s click White, Background 1, Darker 35% (fifth row, first option from the left).
Select Stop 2 from the list, and then do the following:
In the Stop position box, enter 80%.
Click the button next to , and then under Theme s click White, Background 1, Darker 35% (fifth row, first option from the left).
Select Stop 3 from the list, and then do the following:
In the Stop position box, enter 100%.
Click the button next to , and then under Theme s click White, Background 1, Darker 15% (third row, first option from the left).
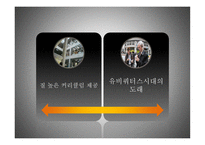
Right-click the top left shape in the graphic, and then click Format Shape. In the Format Shape dialog box, in the left pane, click Fill. In the Fill pane, click Picture or texture , and then under Insert from, click File. In the Insert Picture dialog box, select a picture and then click Insert.
Right-click the top right shape in the graphic, and then click Format Shape. In the Format Shape dialog box, in the left pane, click Fill. In the Fill pane, click Picture or texture , and then under Insert from, click File. In the Insert Picture dialog box, select a picture and then click Insert.
Right-click the bottom left shape in the graphic, and then click Format Shape. In the Format Shape dialog box, in the left pane, click Fill. In the Fill pane, click Picture or texture , and then under Insert from, click File. In the Insert Picture dialog box, select a picture and then click Insert.
Right-click the bottom right shape in the graphic, and then click Format Shape. In the Format Shape dialog box, in the left pane, click Fill. In the Fill pane, click Picture or texture , and then under Insert from, click File. In the Insert Picture dialog box, select a picture and then click Insert.
To reproduce the animation effects on this slide, do the following:
On the Animations tab, in the Animations group, click Custom Animation.
On the slide, select the graphic, and then do the following in the Custom Animation task pane:
Click Add Effect, point to Entrance, and then click More Effects. In the Add Entrance Effect dialog box, under Subtle, click Expand.
Under Modify: Expand, in the Speed list, select Fast.
Under Modify: Expand, in the Start list, select After Previous.
Also in the Custom Animation task pane, click the aow to the right of the animation effect, and then click Effect Options. In the Expand dialog box, on the SmartArt Animation tab, in the Group Graphic list, select One by one.
Also in the Custom Animation task pane, click the double-aow below the animation effect to expand the list of effects, and then do the following:
Press and hold CTRL, and then select all five animation effects in the Custom Animation task pane. Under Modify: E





 분야
분야


